A blog post creation overview - tech part
Recently I was working on the blog setup for my brother. Under the hood it utilizes the same workflow and blogging engine used for my blog at the moment. More precisely the buildings blocks are:
- hugo - a static site generator that allows to create blog posts in
markdown; - github - a cloud platform for developers and companies to host their projects;
- cloudflare workers - a serverless platform that might be used to host static sites.
There will be a separate blog post (or a series of them) on how to setup such blog however today I want to provide some overview on how a blog post creation workflow looks like. The main reader is my brother as he is a non-tech guy, a surgeon however it might be useful for everyone who is interested in the topic.
A setup schema for the blog looks like this:
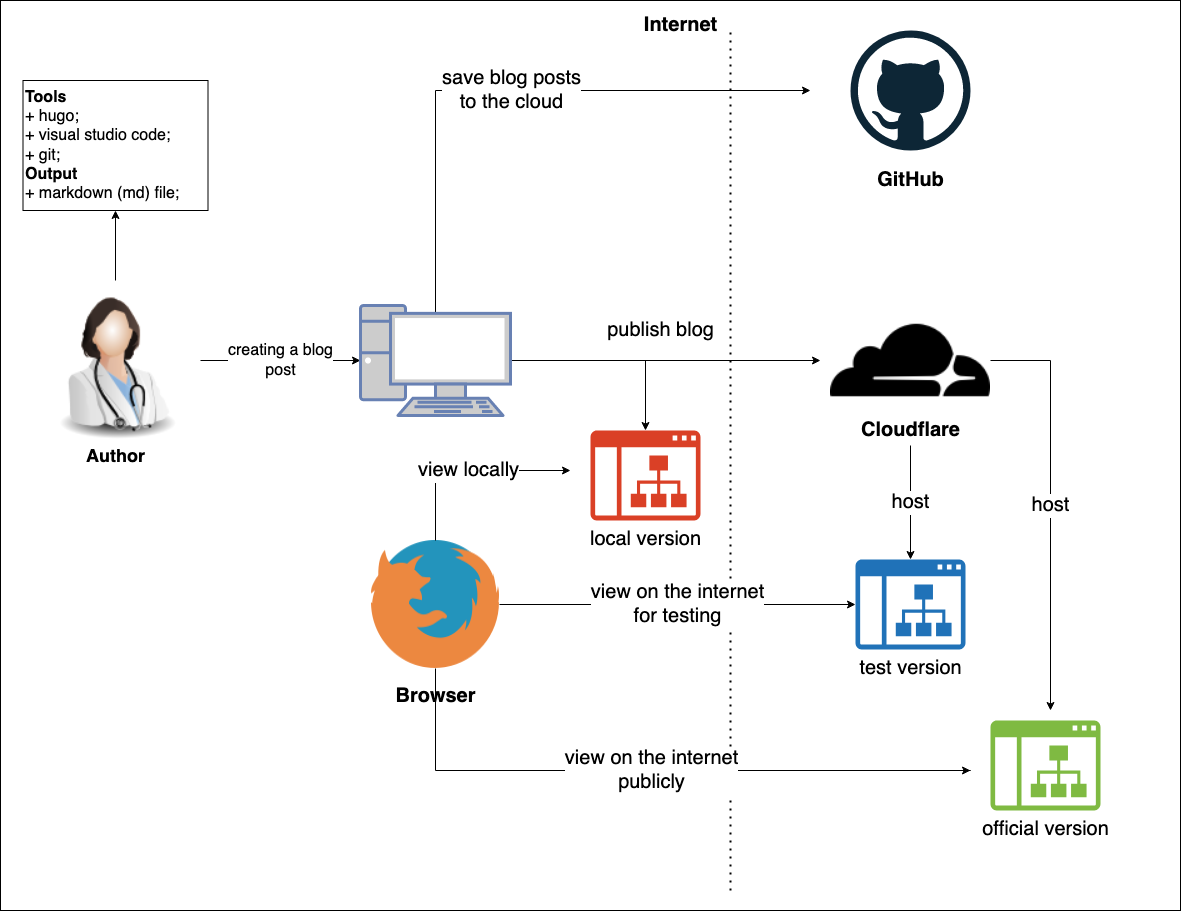
Tools
In order to make the blog management more pleasant and adequate a set of different tools has been created. Utilizing them together will speed up the mechanical part of a blog post creation and help to avoid common pitfalls. All of these tools (except cloudflare workers) are free to use.
Hugo
As was mentioned above hugo is a static site generator that allows to create the content of the blog with the help of markdown. Markdown is a user-friendly plain text formatting syntax. It provides the ability to format the text (add headers, make it bold, italic, etc.) in the manner that will be both well-readable, easy to create by everyone and easy to render. Personally I try to use markdown everywhere where a text management is required (most of the notes, blogs, READMEs, etc.).
Markdown is extremely popular at the moment however web and web-browsers do not understand how to turn it into a site. This is where hugo comes into play. For the end-users hugo is an executable piece of software that converts your blog created with the help of markdown into a static site that could be displayed by the browsers. In order to be accessible from all over the internet this static site should be hosted somewhere. For our purposes we use cloudflare workers.
Visual Studio Code
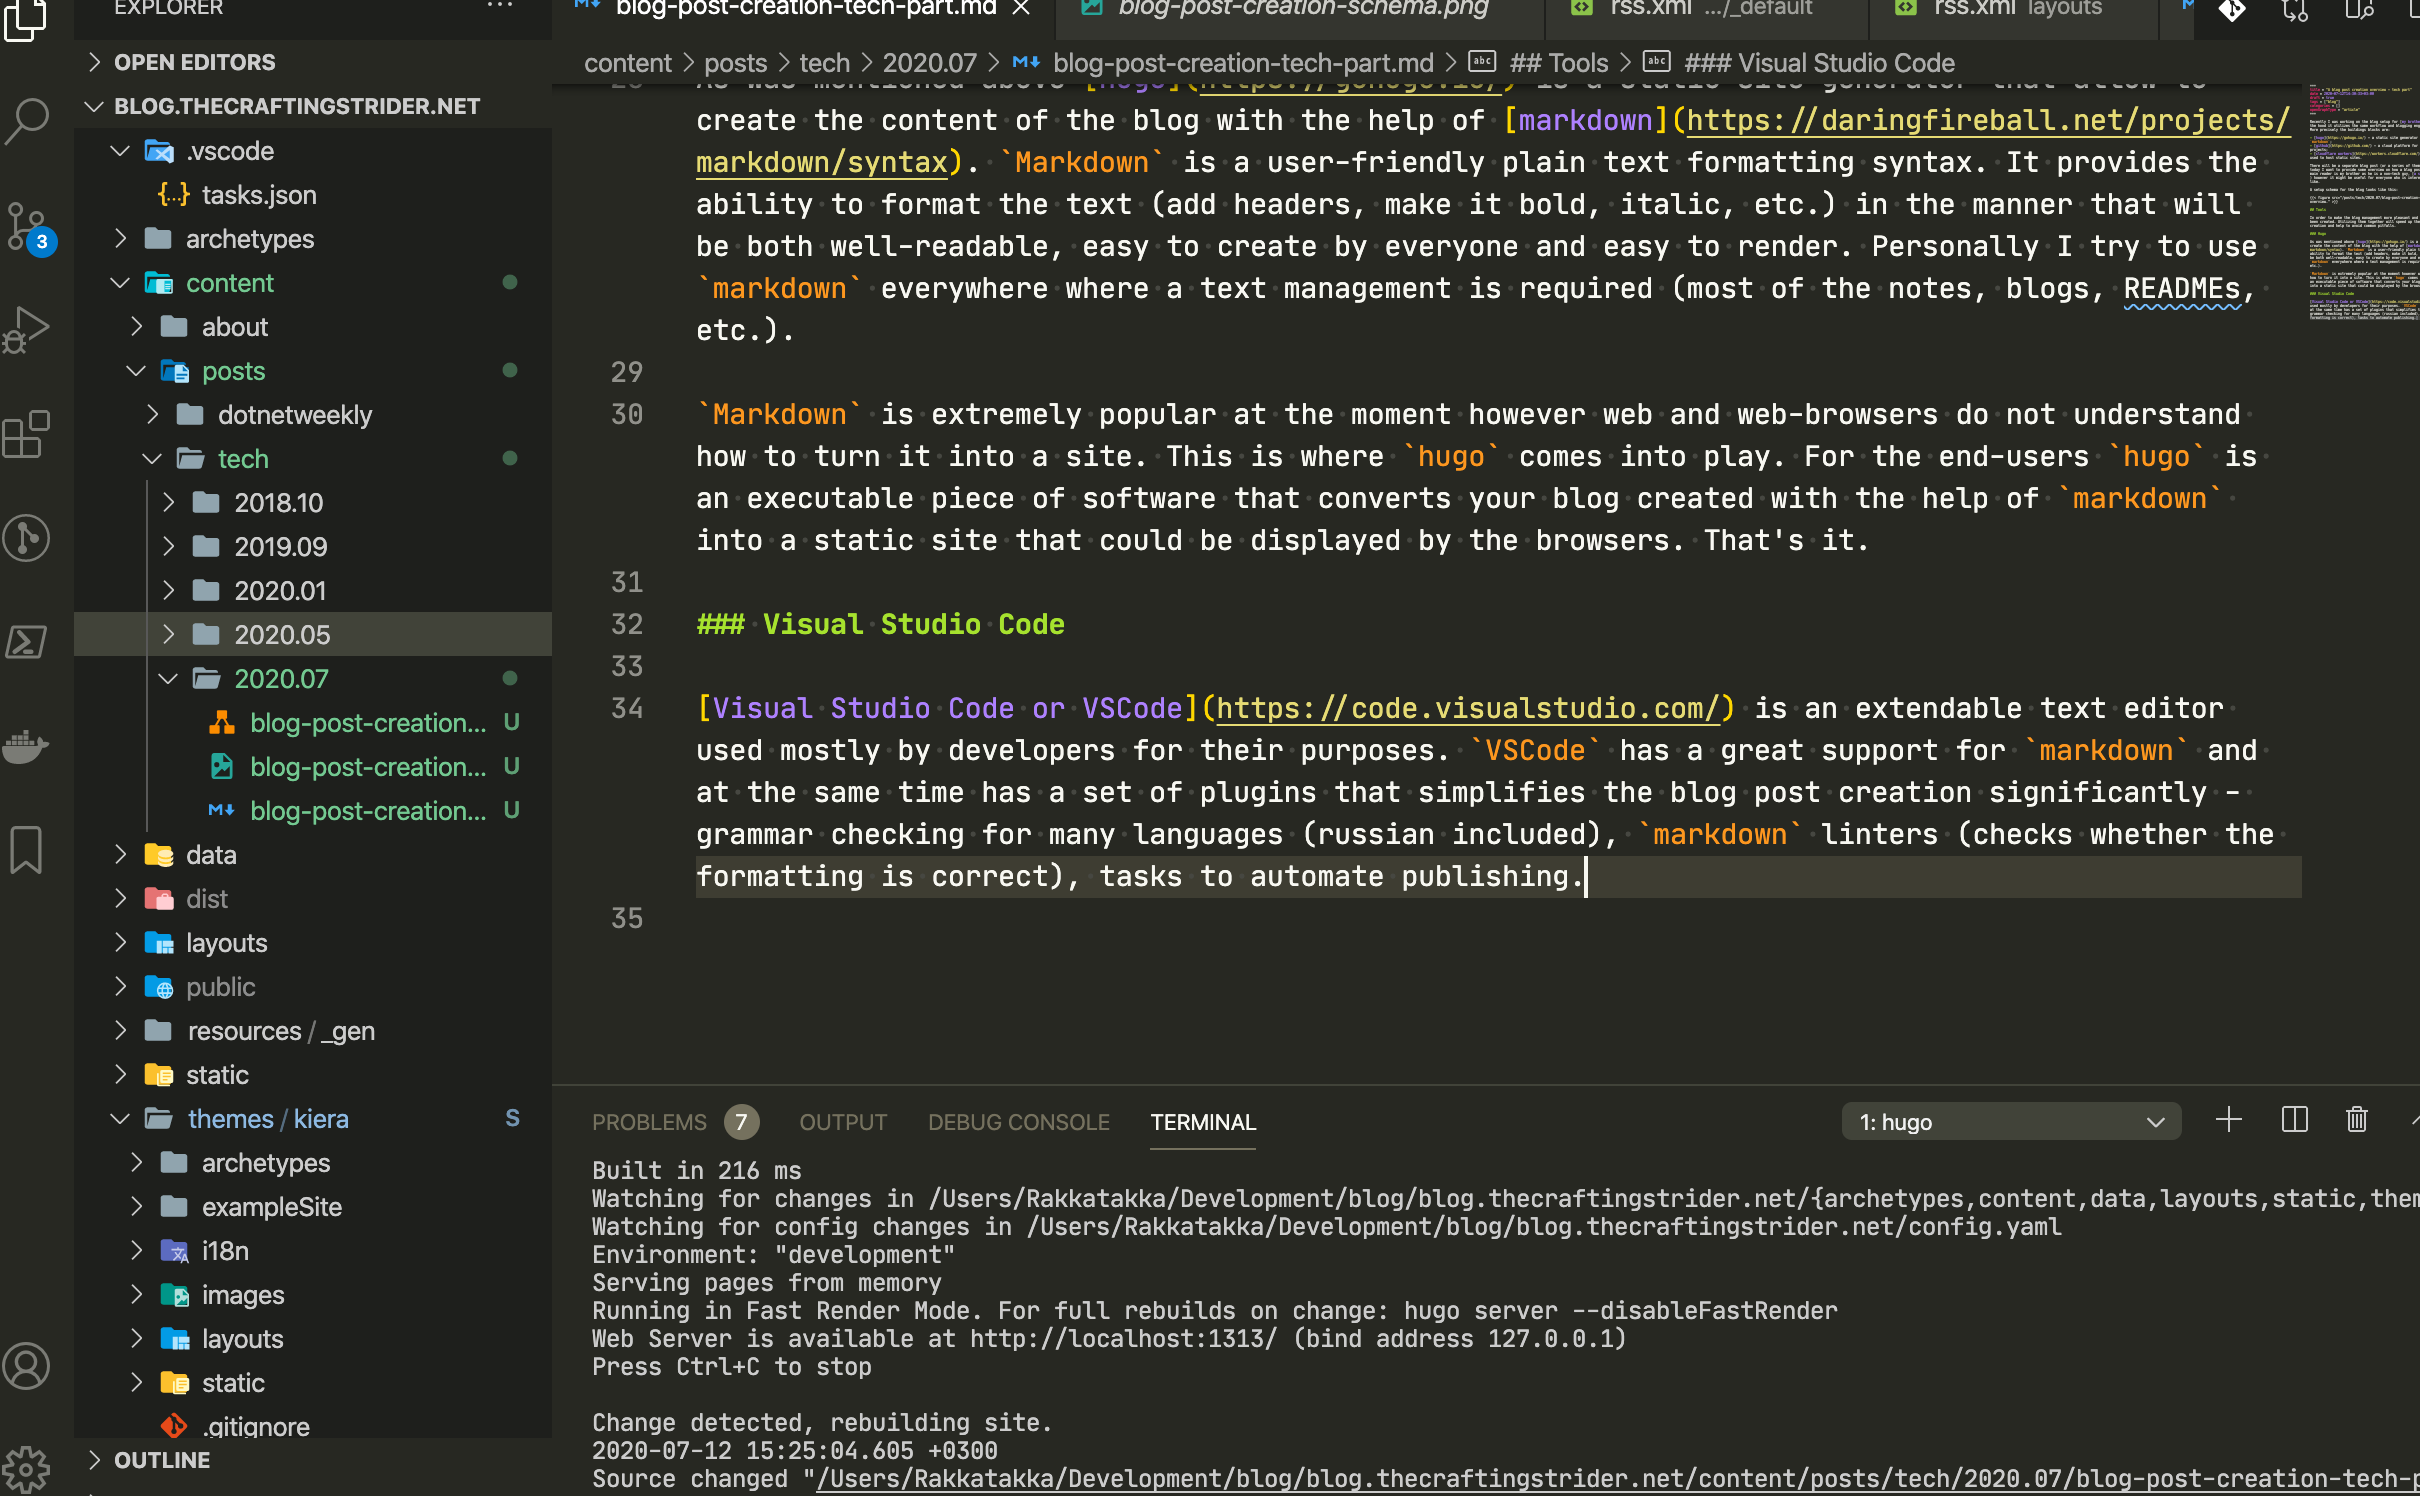
Visual Studio Code or VSCode is an extendable text editor used mostly by developers. VSCode has a great support for markdown and at the same time has a set of plugins that simplifies the blog post creation significantly - grammar checking for many languages (russian included), markdown linters (checks whether the formatting is correct), tasks to automate publishing.
This is how the VSCode window looks like when I create a new blog post or edit an existing one.
Git
Git is a distributed version control system. What it allows to do is to track changes in files and synchronize them across different people and/or devices. This is not a mandatory tool for us - using cloud storage such as dropbox, onedrive, etc. might be sufficient. However the most popular development platform GitHub works with git and having a GitHub profile even for non-tech people is a plus in the CV.
Workflow
Keeping all these tools in mind let’s move to the actual workflow for the blog post creation.
Working Locally
- Launch
VSCode. - Open the folder or workspace with your blog. It could be done by going to
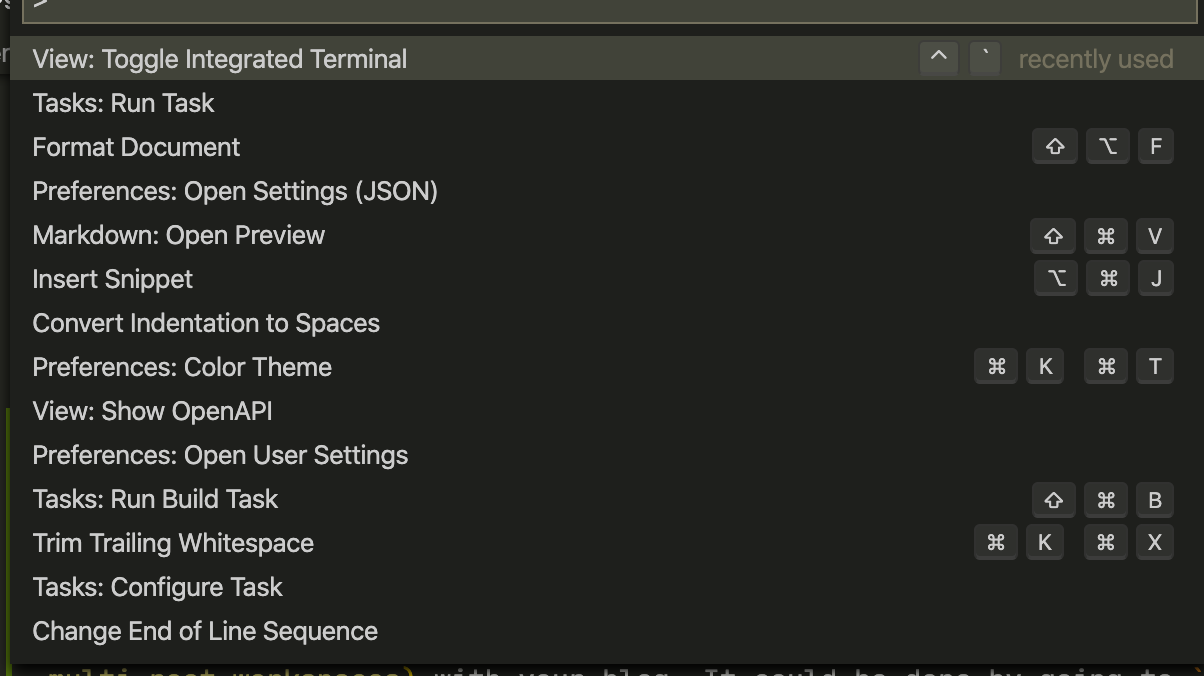
Filein the menu and selectingOpen/Open Workspacethere orOpen Recentif you’ve already played with your blog before. - Once the blog is opened type
Ctrl + Shift + Pon the keyboard. This action will trigger the command input inside ofVSCode. EnterToggle Integrated Terminal. A single item should appear in the list. PressEnter.
- A terminal should be displayed on the UI now.

- In order to create a new post
hugo newcommand should be used. For example for this blog entry the following command was executed -hugo new posts/tech/2020.07/blog-post-creation-tech-part.md. The path to the file inside your blog might be different for your specific purpose so use the one above as a reference, not a rule. - Once you open a newly created blog post file you will see some default content inside of it. This is a meta information for the blog entry. Enter your specific
titleandtags. An important field here isdraft. If its value is set to true your article won’t be displayed on you site by default. So once you are done with blog entry creation simply remove this line.
+++
title = "A blog post creation overview - tech part"
date = 2020-07-12T14:30:33+03:00
draft = true
tags = ["blog"]
categories = []
openGraphType = "article"
+++
- Now you could fill the content of your blog post inside.
hugoprovides an ability to view how your blog post will be displayed later on in the internet locally. In order to do this you should enter the following command in the terminal -hugo server -D. Please be aware that once a server is launched it will track any changes in the your local blog posts and display them in the browser so you do not need to enterhugo server -Dall the time.
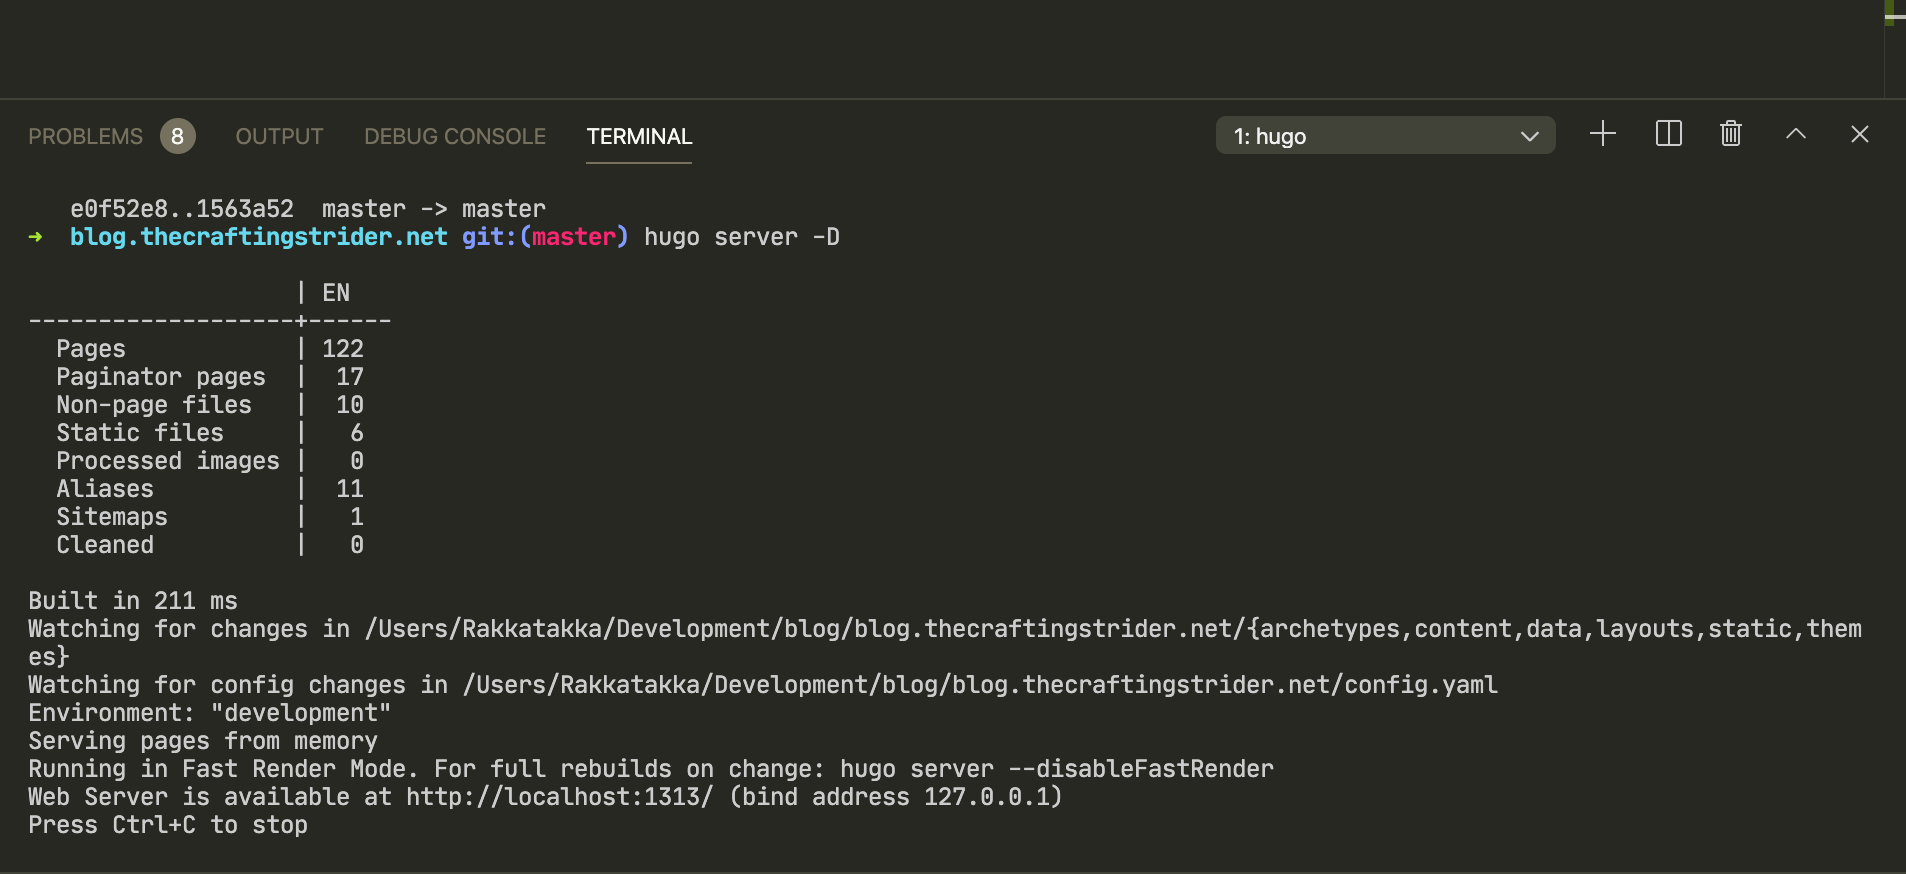
- Once the server is launched you could enter the following URL -
http://localhost:1313/- in the browser and view the content of your blog. It will renderdraftarticles so do not worry about them for now. Please be aware thathugo server -Dcommand captures the terminal and in order to type other commands you will need to stop server first. EnterCtrl + Cto do this.
Publishing
In order to make the article available to everyone online you will need to publish it first. As was mentioned above we rely on cloudflare to do this. A best practice here is to first preview a test version to make sure that the article is displayed as you want.
“Why do we need to do this if we tested everything locally?”- you may ask and this will be a valid question. For most of the cases the content will be almost identical. However in the online version some links might be broken or incorrect due to the security restrictions, etc. so I always recommend to preview the changes in the cloud first.
- Please remove
draft = truefor the blog entry (entries) you are going to publish. - Enter
Ctrl + Shift + Pin order to open the command prompt. TypeRun Taskinside.
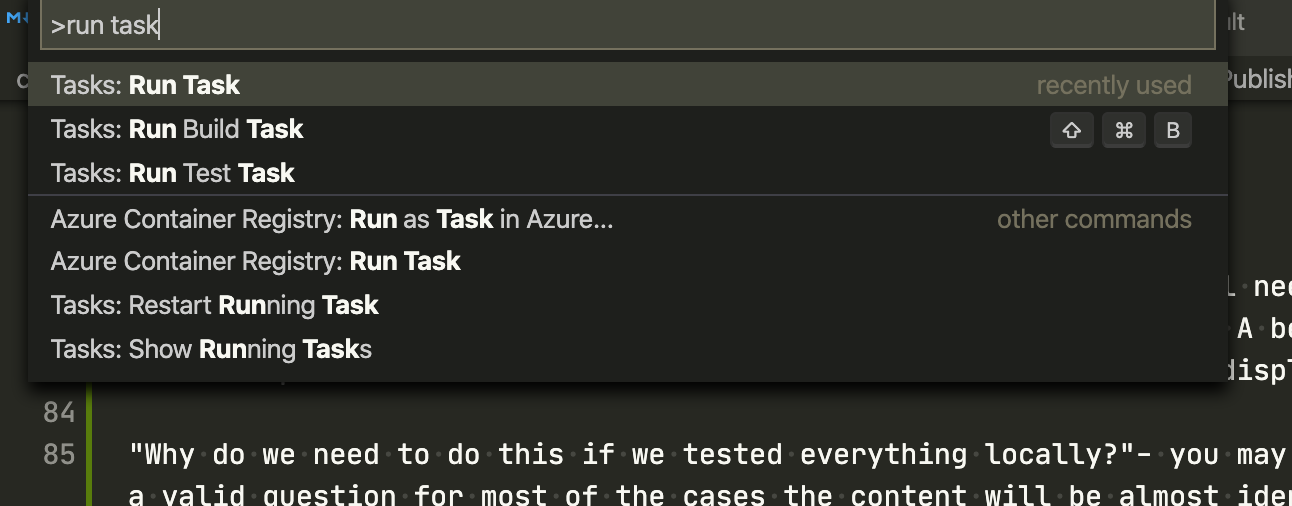
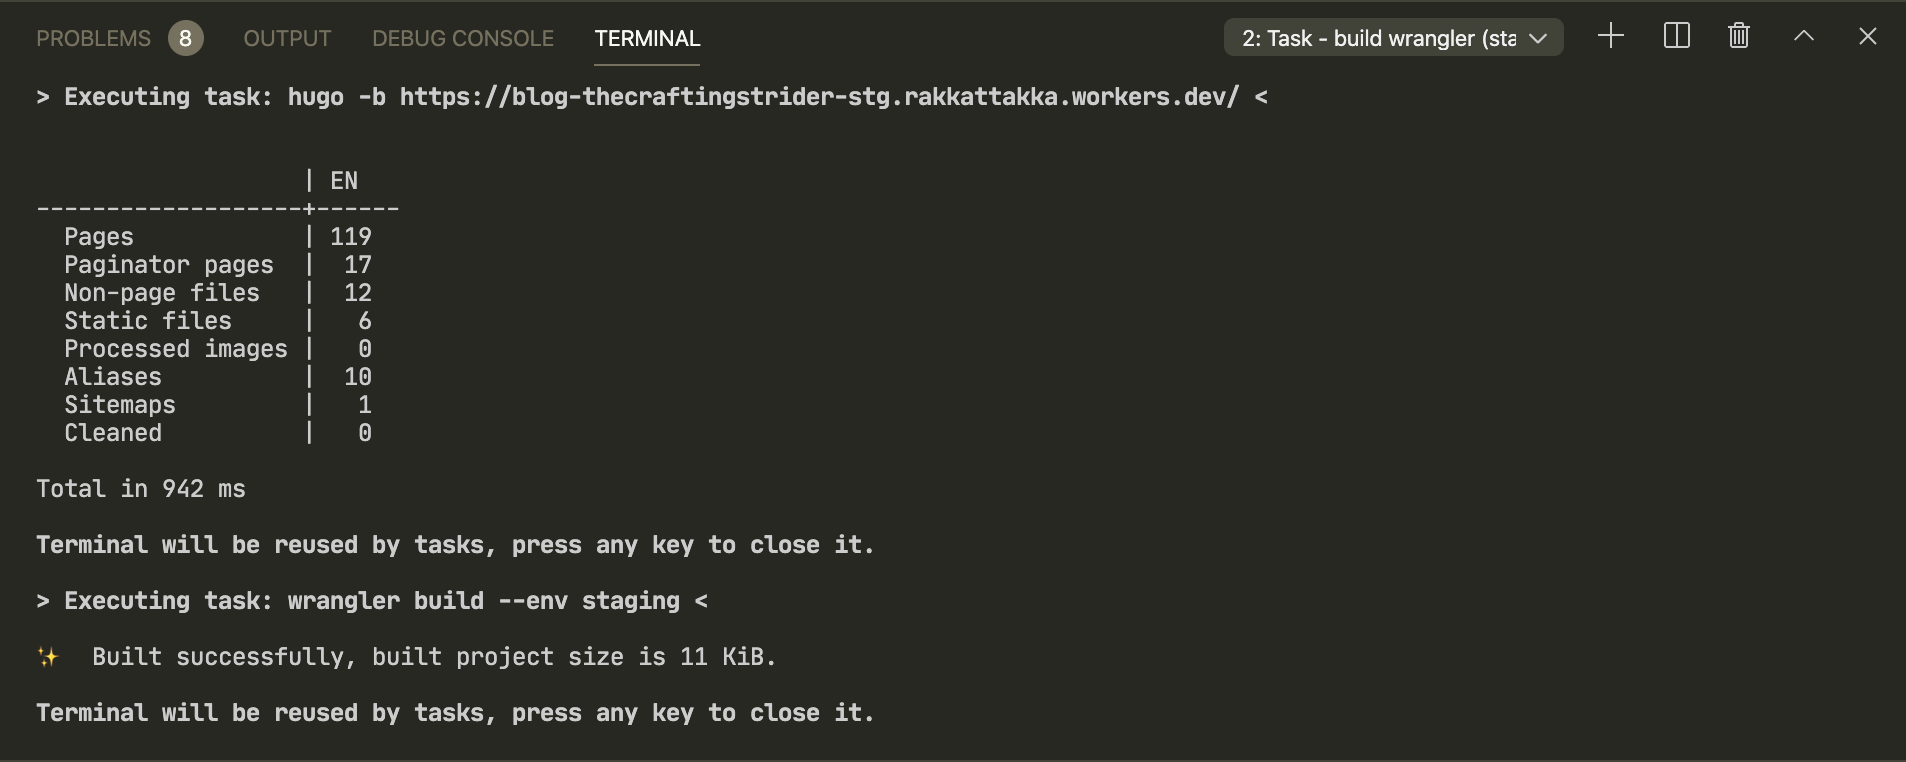
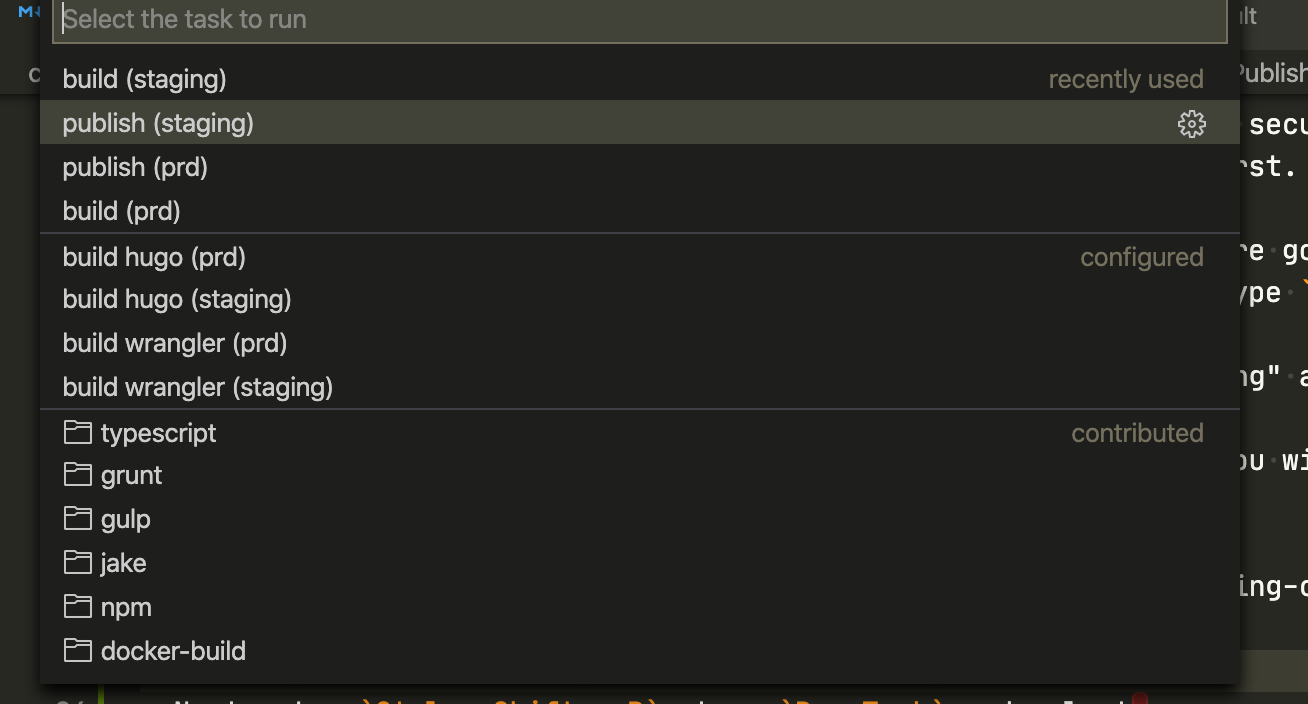
- Select
build (staging)task. Once the operation is complete you will see the following in the terminal prompt.
- Next enter
Ctrl + Shift + P, typeRun Taskand selectpublish (staging). The publish operation will deliver the content of your site to the remote servers (owned bycloudflare).
- Once the operation is complete a URL will be displayed in the logs. You could follow the link with the help of
Ctrl + Clickoperation.

- Verify the content of your new blog post. Address any issues if needed.
- In order to deploy the changes to your real blog run
build (prd)first, andpublish (prd)next. You might need to reload the page in order the changes to take effect due to the browser cache. - Enjoy the results.
Persist changes
When you are happy with the newly created blog post let’s make sure that it won’t be lost if something happens with your PC. We will use Git for this. Disclaimer: this is not a fully-featured guide. It describes only the workflow that might be useful for a single author to help saving changes remotely.
- Go to the terminal and enter
git add -Ahere. This command will capture all changes to the files made locally on your machine. You could typegit statusin order to display the list of affected files. - Enter
git commit -m "<message>"where<message>should be replaced with a meaningful sentence describing what you’ve done. Likecreate a post about post creation. This command will record the changes. - Enter
git push origin masterin order to deliver the recorded changes to the remote servers.GitHubin our case. - Once this is done you could navigate to the
GitHubrepository where your blog sits and see that some of the files have been updated recently.
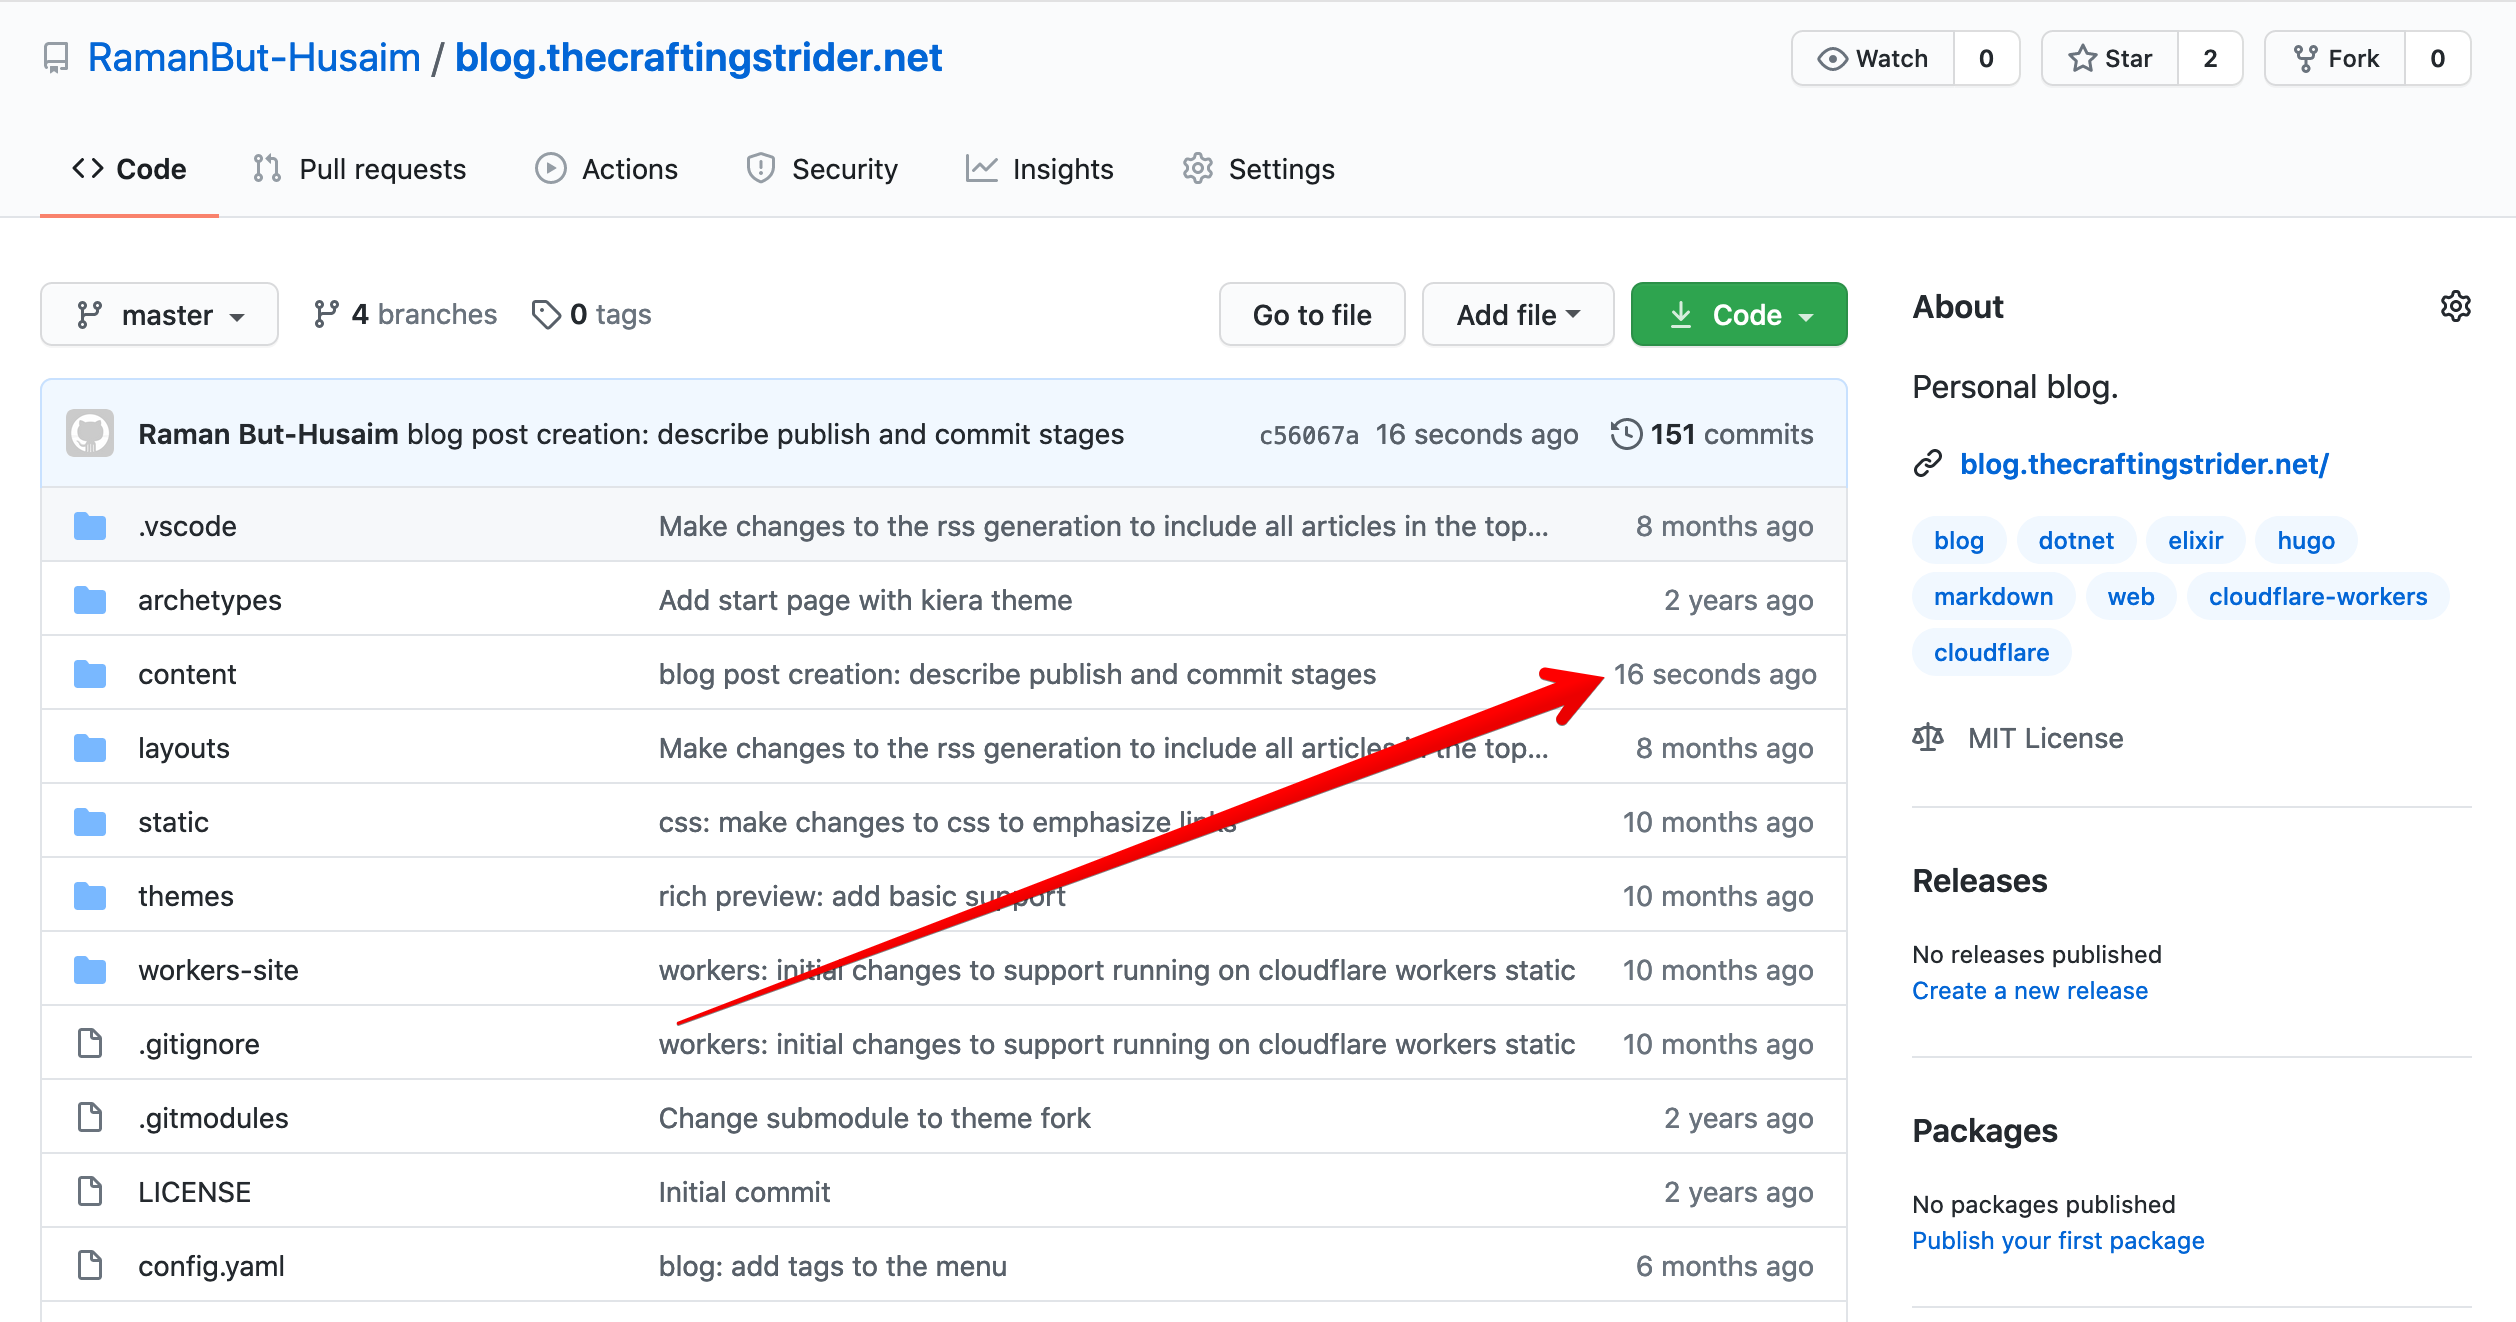
Please be aware that if you or someone else changed the content of your GitHub blog from other PC you will need to grab these changes first. In order to do this a following set of commands might help:
git fetch --all;git pull origin master;
Cheat Sheet
Ctrl + Shift + P- launch the terminal inVSCode;hugo new <path and post name>- create a new blog post;hugo server -D- launch hugo server for testing purposeslocally;- task
build (staging)- build your site for testing in the cloud; - task
publish (staging)- deliver your site for testing in the cloud; - task
build (prd)- build your site in the cloud; - task
publish (prd)- deliver your site in the cloud; git add -A,git commit -m "<message>"andgit push origin master- save the changes in the cloud (GitHub).